Breaking News


Enter your email address below and subscribe to our newsletter
Software reviews & tutorials you can actually trust.
Want to build your website but stuck on the setup? In this post, I will show you exactly how to connect domain to WordPress in just a few simple steps.
Connect domain to WordPress. If you are reading this, you probably just bought your very first domain name and are ready to build your dream website. Congratulations! Taking this step is incredibly exciting. However, the technical side of things can feel a little overwhelming at first glance. Do not worry. I am going to show you exactly how to connect domain without pulling your hair out.
When you decide to connect domain to WordPress, you are essentially building a bridge between your website’s name (your domain) and where your website actually lives (your hosting). Many beginners think this process requires a computer science degree, but I promise you it does not. To connect domain, you just need to follow a few simple steps, click a few buttons, and wait a few minutes.
In this complete, beginner-friendly guide, I will walk you through everything you need to know. We will cover why you must connect domain to WordPress, the exact methods you can use to connect domain , and how to fix common issues that happen when you connect domain. Let’s dive right in and learn how to connect domain to the right way.
Before we actually connect domain to WordPress, it helps to understand what is actually happening behind the scenes. Think of your domain name as the sign outside your business. It tells people who you are. Think of your web hosting as the actual brick-and-mortar building where your products, staff, and inventory live.
If you want people to walk through the front door and see your products, you have to connect the sign to the building. That is exactly why we connect domain. Without taking the time to connect domain to hosting, anyone who types your beautiful new web address into their browser will just see a blank page or an error message.
When you successfully connect domain to hosting, you are telling the global internet system (called the Domain Name System, or DNS) exactly where to send your visitors. To connect domain to hostingproperly ensures that when someone types www.yourwebsite.com, they instantly see your WordPress dashboard and your live site. If you fail to connect domain to hosting, your website simply does not exist to the public eye.
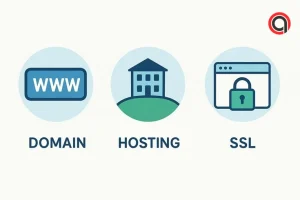
You cannot just wake up one day and connect domain to WordPress out of thin air. Before you can connect domain to hosting, you need to have two specific things ready to go.


To connect domain to WordPress, you need a domain name. A domain name is your unique web address, like myawesomeblog.com. You can buy domain names from popular registrars like Namecheap, GoDaddy, or Domain.com. Make sure you have purchased your domain and that it is fully registered to your account before you try to connect domain to hosting.
The second thing you need before you connect domain to WordPress is a web hosting account. WordPress needs a server to store its files, images, and database. You can get hosting from companies like Bluehost, SiteGround, or WP Engine. Once you have signed up for hosting and installed WordPress, you are ready to connect domain to hosting.
The easiest and most common way to connect domain to WordPress is by changing your domain’s nameservers. When you buy hosting, your hosting company gives you two nameservers. To connect domain to hosting, you simply take those nameservers and paste them into your domain registrar’s settings.
Here is the exact step-by-step process to connect domain to hosting using nameservers:
Log into your web hosting account. Look for a section called “Welcome Email,” “Account Details,” or “DNS Settings.” In this area, you will see two nameservers. They usually look something like ns1.hostingcompany.com and ns2.hostingcompany.com. Write these down. You will need them to connect domain to hosting.
Now, open a new tab and log into the account where you bought your domain name (like Namecheap or GoDaddy). Go to your domain management dashboard. Look for an option that says “DNS,” “Nameservers,” or “Custom DNS.” This is the control panel you will use to connect domain to hosting.
Select the option to use “Custom Nameservers.” Delete any default nameservers that are currently there. Paste the two nameservers you got from your hosting company into the boxes. Click “Save” or “Update.” Congratulations, you have just told your domain to connect domain to hosting!
When you connect domain to WordPress using nameservers, the changes do not happen instantly. The internet needs time to update its massive phonebook. This process is called DNS propagation. It can take anywhere from 10 minutes to 24 hours for the connection to fully go live. Be patient while you wait to connect domain to WordPress.
Sometimes, you cannot use nameservers to connect domain to WordPress. For example, if you use a service like Cloudflare to speed up your website or protect it from hackers, you want to keep Cloudflare’s nameservers. In this case, you will connect domain to WordPress using A Records.
An A Record connects your domain directly to an IP address. To connect domain to WordPress using A Records, follow these steps:
Log into your web hosting control panel (like cPanel). Look for “Server Information” or “Shared IP Address.” Write down that IP address. You need this number to connect domain to WordPress.
Go back to your domain registrar (or Cloudflare dashboard). Find the “DNS Management” or “Zone Editor” section. This is where you will manually connect domain to WordPress.
Look for the option to “Add Record.” Choose “A” as the record type. In the “Host” or “Name” field, type the @ symbol (this represents your root domain). In the “Value” or “Points to” field, paste your hosting IP address. Click “Save.”
To make sure your www version also works when you connect domain to WordPress, add another A Record. Type www in the Host field, and paste the exact same IP address in the Value field. Save it. You have now successfully used A Records to connect domain to WordPress!
If you are using the hosted version of WordPress at WordPress.com (instead of the self-hosted WordPress.org), the process to connect domain to WordPress is a little bit different. WordPress.com handles a lot of the technical stuff for you, making it very easy to connect domain to WordPress.
Log into your WordPress.com dashboard. Hover over “My Sites” on the left menu, click “Manage,” and then go to “Settings.” Click on the “Domains” tab at the top. This is the central hub where you connect domain to hosting on this specific platform.
Scroll down past your current .wordpress.com address. You will see a button that says “Add a domain” or “Connect domain to hosting.” Click that button.
Type in the domain name you purchased from your registrar. WordPress.com will check if the domain is available. Since you already own it, it will allow you to proceed to connect domain to WordPress.
WordPress.com will give you two options: transfer the domain to them, or simply connect it. Choose the option to connect domain to WordPress. WordPress will then give you a set of nameservers or DNS records. You will take those details, go back to your domain registrar (like GoDaddy or Namecheap), and update your DNS settings just like we talked about in Method 1 or Method 2. Once you update those settings, you have successfully managed to connect domain to hosting on WordPress.com!
Sometimes, people do not want to connect domain to hosting for their main homepage. Instead, they want to connect domain to WordPress for a specific folder, like yourwebsite.com/blog. To connect domain to hosting in a subdirectory, you usually do not need to change any DNS settings at all.
If your main website is already running and you just want to connect domain to WordPress for a blog section, you simply install WordPress into a subfolder via your hosting cPanel. Once installed, that specific folder automatically becomes a WordPress site. You do not need to connect domain to hosting via DNS for this, because the main domain is already pointing to the server. You just access it by going to yourwebsite.com/blog/wp-admin.
Even when you follow all the instructions to connect domain to WordPress perfectly, sometimes things go wrong. Do not panic. Here are the most common issues you might face when you connect domain to hosting, and how to fix them.
If you see this error in Google Chrome, it means your browser cannot find the server. This happens 99% of the time because your DNS changes have not propagated yet. Remember, when you connect domain to WordPress, it takes time. Wait a few hours and try again. You can also use a free tool like WhatsMyDNS.net to check if your DNS has updated globally.
Sometimes, after you connect domain to WordPress, your browser gets stuck in an infinite redirect loop (ERR_TOO_MANY_REDIRECTS). This usually happens if you recently migrated your site or changed your SSL settings. To fix this when you connect domain to WordPress, log into your hosting file manager, open your wp-config.php file, and add this line of code above the “That’s all, stop editing!” line: define('RELOCATE', true); This forces WordPress to recognize the new connection.
If you have multiple hosting accounts, you might accidentally connect domain to WordPress using the wrong nameservers or IP address. Double-check the welcome email from the specific hosting account where your WordPress files are installed to ensure you connect domain to WordPress to the correct server.
When you connect domain to WordPress, you must also think about security. Have you ever noticed that almost all websites start with https:// instead of http://? That “S” stands for secure. It means the data passing between your website and your visitors is encrypted.
After you connect domain to hosting, you should immediately install an SSL certificate. Most modern hosting companies offer free SSL certificates through Let’s Encrypt. If you connect domain to hosting but do not have an SSL certificate, Google Chrome will flag your website as “Not Secure.” This will scare away visitors and hurt your search engine rankings.
To secure your site after you connect domain to hosting, simply go to your hosting control panel, find the “SSL/TLS Status” or “Security” section, and turn on auto-SSL. Once active, you should also force HTTPS in your WordPress settings. Go to Settings > General in your WordPress dashboard, and make sure both your WordPress Address and Site Address start with https://. Doing this right after you connect domain to hosting ensures your site is safe from day one.
To make your life easier in the long run, follow these best practices when you connect domain to hosting:
While I have explained how to connect domain to hosting when they are purchased from separate companies, the absolute easiest way to avoid DNS headaches is to buy your domain and your hosting from the exact same company. If you buy both from SiteGround, for example, they automatically connect domain to WordPress for you during the checkout process. You never have to touch a nameserver. However, if you already bought them separately, you can still easily connect domain to hosting using my guides above.
If you have an existing website and you are trying to connect domain to hostingto a new hosting server, do not do it in the middle of the day when your traffic is highest. When you connect domain to hosting, there is a brief period of DNS propagation where some visitors might see the old site and some might see the new site. Do this late at night or on a weekend to minimize disruption when you connect domain to WordPress.
When you connect domain to hosting, your computer might try to be “helpful” by remembering the old settings. If you have updated your nameservers but still see an error page, clear your browser cache, or try opening your website in an “Incognito” or “Private” browsing window. This forces your browser to look up the new settings so you can see that you successfully managed to connect domain to WordPress.
Once you successfully connect domain to hosting, the fun part finally begins! You no longer have to worry about IP addresses, nameservers, or A Records. You can now log into your WordPress dashboard and start building your website.
Here is what you should do immediately after you connect domain to hosting:
None of this would be possible if you didn’t take the time to connect domain to hosting. By taking this crucial step, you have turned a blank domain name into a fully functional, living website.
In rare cases, you might do everything right to connect domain to hosting , but it still won’t work. This usually happens if your domain registrar has special security locks in place.
Sometimes, registrars enable a “Transfer Lock” or “Registry Lock” on your domain. While this is meant to prevent people from stealing your domain, it can sometimes interfere when you try to connect domain to hosting . Check your domain dashboard to ensure all transfer locks are disabled while you make DNS changes. Once you connect domain to hosting successfully, you can turn the locks back on for security.
When you connect domain to hosting, you might see a setting called “TTL” next to your DNS records. TTL stands for Time to Live, and it is measured in seconds. It tells the internet how long to cache your DNS records. If your TTL is set to a high number (like 14400 seconds, which is 4 hours), it will take much longer for your changes to go live when you connect domain to hosting. If you know you are going to connect domain to WordPress tomorrow, log into your DNS settings today and lower the TTL to 300 seconds (5 minutes). This will make the actual connection process much faster.
As mentioned earlier, another way to describe this process is learning how to link domain to WordPress. Whether you say you want to link domain to WordPress or connect domain to WordPress, the core technical steps remain exactly the same. To link domain to WordPress, you must point the domain’s DNS to the host’s servers.
Some advanced users prefer to link domain to WordPress using a CNAME record instead of an A Record. A CNAME record links a domain name to another domain name, rather than an IP address. However, for standard WordPress setups, using an A Record or Nameservers to connect domain to WordPress is the highly recommended route.
Building a website is a massive achievement, and learning how to connect domain to hosting is the very first, most important hurdle to clear. It might seem intimidating with all the technical jargon like DNS, nameservers, and IP addresses, but as you can see from this guide, anyone can do it.
Whether you decide to connect domain to hosting using simple nameservers, or you choose to connect domain to WordPress manually using A Records, the process only takes a few minutes of actual work. The rest is just waiting for the global internet to catch up.
Take a deep breath, grab the nameservers or IP address from your hosting company, log into your domain registrar, and connect domain to hosting today. Once you press that save button and successfully connect domain to hosting, you are officially a website owner.
If you run into any issues while you connect domain to hosting, just re-read the troubleshooting section above. Most problems are solved by simply waiting a few hours for propagation or clearing your browser cache. Now go connect domain to WordPress and start sharing your amazing content with the world!
More About Software Reviews, Best0f List & Comparisons, WordPress Tutorial